Assessment catalogs are a way for VarSeq users to save variants and variant information for clinically relevant variants, so when you come across this variant again in another sample, all of the work to analyze and classify the variant is already done! But there is more than meets to the eye when it comes to using assessments in VarSeq.
Being that assessment catalogs are just tiny (or really big) variant databases; you can actually use assessment catalogs to group or categorize variants in a number of different ways. Assessment catalogs can store clinically relevant variants for different cohorts, queue up complex variants that need further analysis, save and track variants that are really common across samples, or keep variants that are artifacts! Wait, why would you want to keep artifact variants in an assessment catalog? I’m glad you asked!
There are a number of different reasons to account for false positive calls in low complexity regions, namely potential PCR errors or alignment errors, and outside of these regions perhaps more systematic errors occur as you can see these across all samples. In any case, these variants that are consistently encountered as false positive calls or artifacts can be dumped into an assessment catalog. Once they are saved and tracked in an assessment catalog, they can easily be filtered out of analysis so variant analysts do not have to waste time evaluating the quality of these variants from the secondary pipeline.
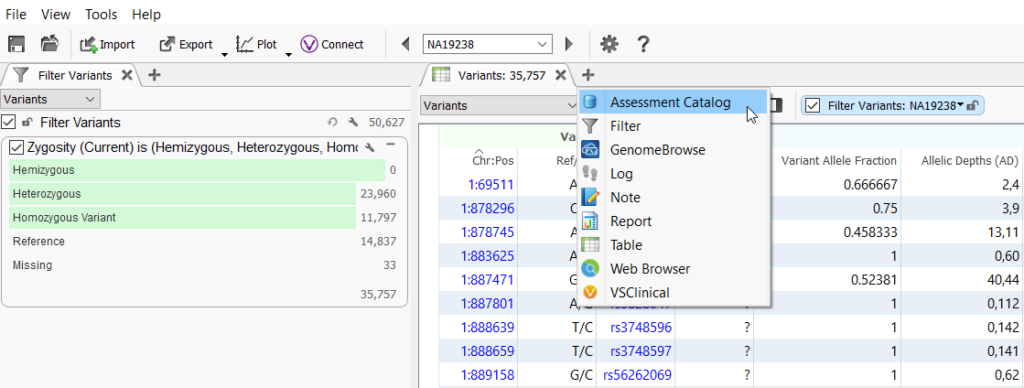
Assessment catalogs can be very elaborate and hold a lot of information about variants like classification, disorder, inheritance, written interpretations, sample information, sequence ontology, and the list goes on and on. But in this case, we do not really need these details about these artifact variants so we can keep the assessment catalog very simple. I can show you exactly how simple this can be! To add the catalog, click on the plus icon in the variant table and select Assessment Catalog (Figure 1).
Click Create New Assessment Catalog and in the next dialog, keep the settings as default but specify a name for the catalog and where you want the catalog to be saved via the Browse button (Figure 2).
The next dialog is the Assessment Catalog Editor, wherein you can add fields to your assessment catalog. There are a lot of field options and their field types which can be reviewed below in Figure 3.
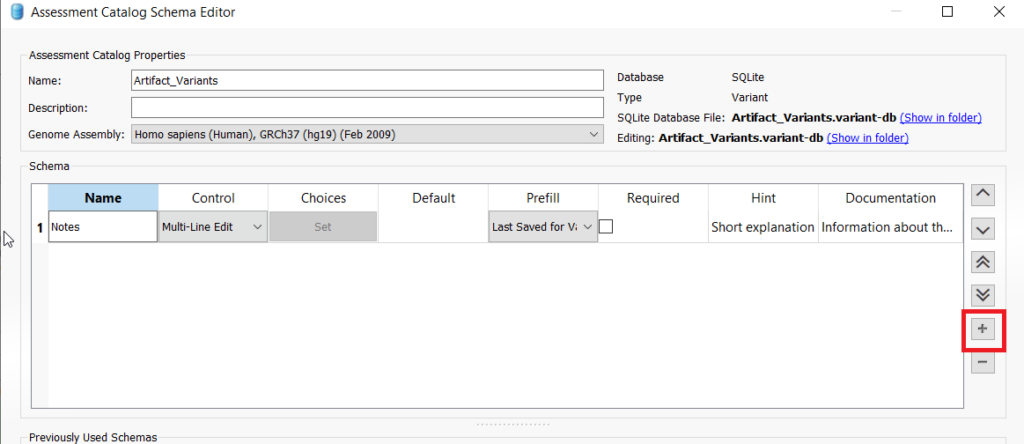
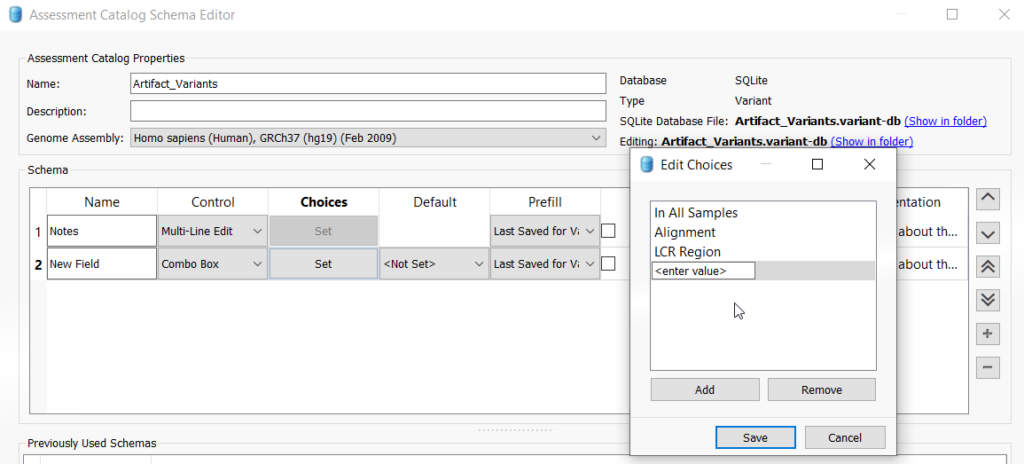
It is important to know that Chromosome, Position, and Ref/Alt are fields that are automatically added to all assessment catalogs. So for our artifact catalog, we might add a notes field wherein the variant analyst can add whatever details may be relevant about this variant. Another possibility is to add a combo box and enter a value for maybe a reason the variant is considered an artifact. To add a field, click on the plus icon on the right of the window to add a new field. To add a notes field, select “Multi_LineEdit” from the Control dropdown and rename the new field to “Notes” (Figure 4). If you want to add the combo box to enter in values for why a variant was selected as an artifact, click the plus icon again and choose ComboBox from the Control dropdown. Then under Choices, click “Set.” Enter in whichever values are appropriate for your workflow (Figure 5). Once you are finished adding fields, you can click save at the bottom of the dialog.
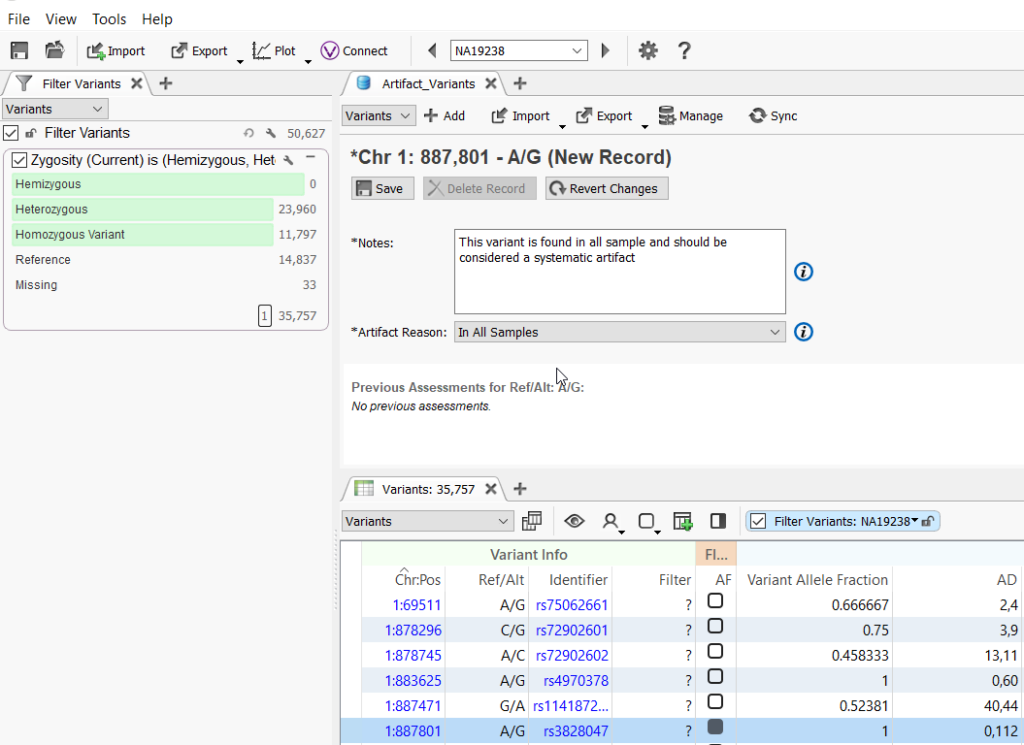
Now all you have to do is add in the artifact variants as you come across them! When an artifact variant is encountered, you can fill in the notes or select the reason that the variant is an artifact, then select the record set box for the variant.
As you continue to build the database of artifact variants, you can use this catalog in your filtering logic as a quality control step. Assessment catalogs can be added to projects as annotations and thus incorporated into filter chains via the summary field of the annotation (Figure 7).
I hope this was a fun tidbit about assessment catalogs and opens up some analytical possibilities! If you have questions about other ways to use assessment catalogs beyond the typical use case, feel free to reach out to us at [email protected].


